


Please Note
The following steps were created using a device with Android 10. The designations of the individual menu items may vary slightly for devices from other manufacturers.
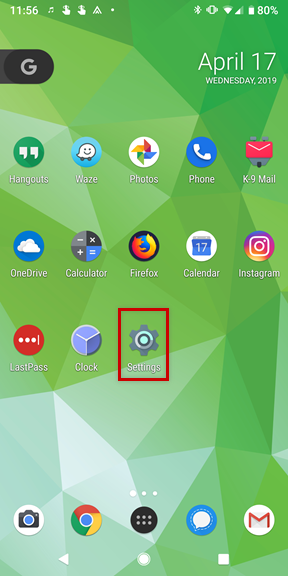
- Tap the Settings icon (typically displayed as a gear).
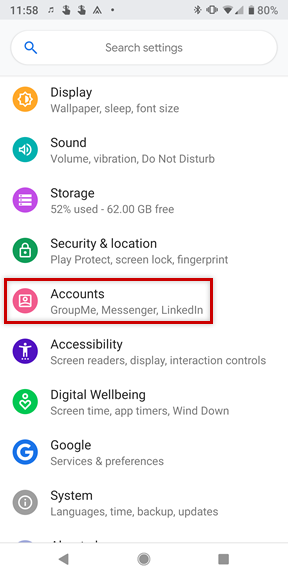
- Go to Accounts.
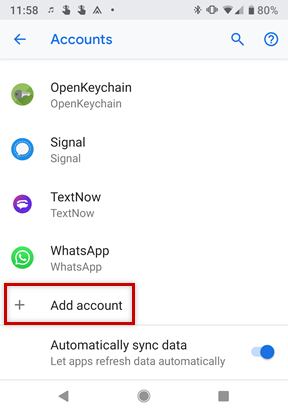
- Tap Add Account.
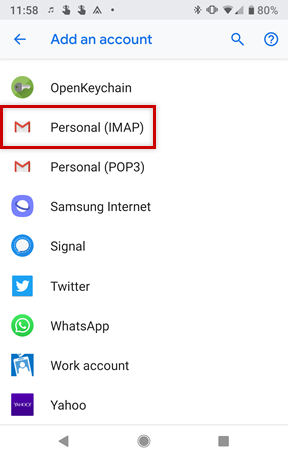
- Select Personal (IMAP).
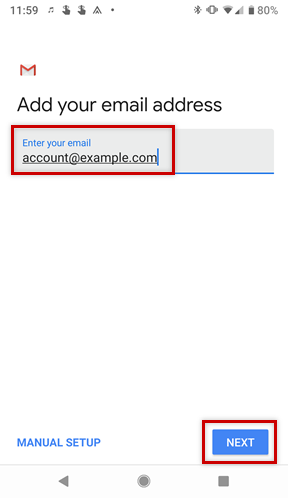
- Enter your email address and tap Next.
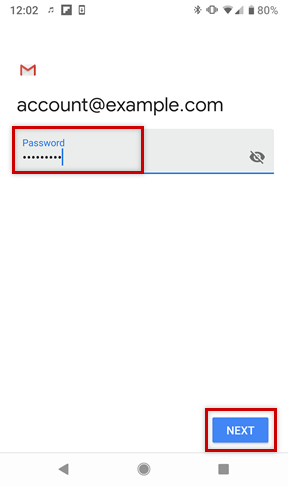
- Enter the password to your email address and tap Next.
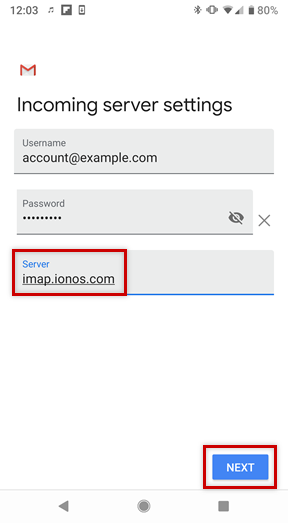
- In the Server field, enter imap.emailpnl.com and tap Next.
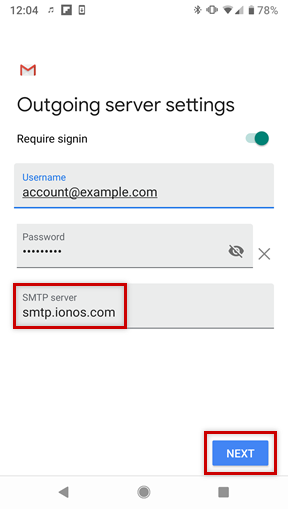
- In the SMTP Server field, enter smtp.emailpnl.com and tap Next.
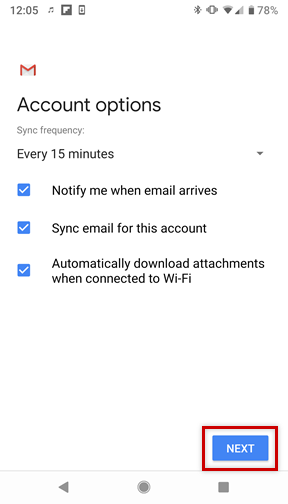
- Choose your desired Account Options and tap Next.
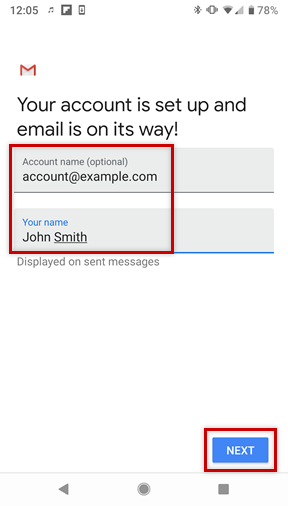
- If you would like, you can change the default Account Name, which helps you differentiate this account from other email accounts on your device, or Your Name, which is displayed on messages you send. Finally, tap Next to complete the setup process.
Please Note
If you choose to perform a manual setup or would like to use a POP3 account instead, you can find the necessary settings below.
| SETTING | FOR IMAP | FOR POP |
|---|---|---|
| Server | imap.emailpnl.com | pop.emailpnl.com |
| Security type | SSL | SSL |
| Port | 993 | 995 |
| SETTING | YOUR INPUT |
|---|---|
| SMTP server | smtp.emailpnl.com |
| Security Type | TLS (Accept all certificates) |
| Port | 465 / 587 |
| Login Requires Checkbox | |
| Username | The full email address of your email account. |
| Password | The password you entered when setting up the email address. |
